Anita Mae Draper
  • Home
  • Books
    • Secret Admirer
    • American Heiress Brides
    • Austen in Austin
    • Here We Come A-Wassailing
    • Riding on a Christmas Wish
  • Blogs
    • Author Memories
    • Inkwell Inspirations
    • Heroes, Heroines, & History
    • Draper's Acres
    • Photo Blog
  • Research
    • The Oregon Trail Ruts
  • Fun
    • Text-Free Photos
    • Recipe Blog
    • Jigsaw Puzzles >
      • Christmas
      • Fauna
      • Flora
      • Travel Destinations
    • Free Reads >
      • The Shepherd
    • Poetry >
      • You Were By My Side

Fabulous Fruitcake by Robin Hood

11/20/2018

2 Comments

 
Picture
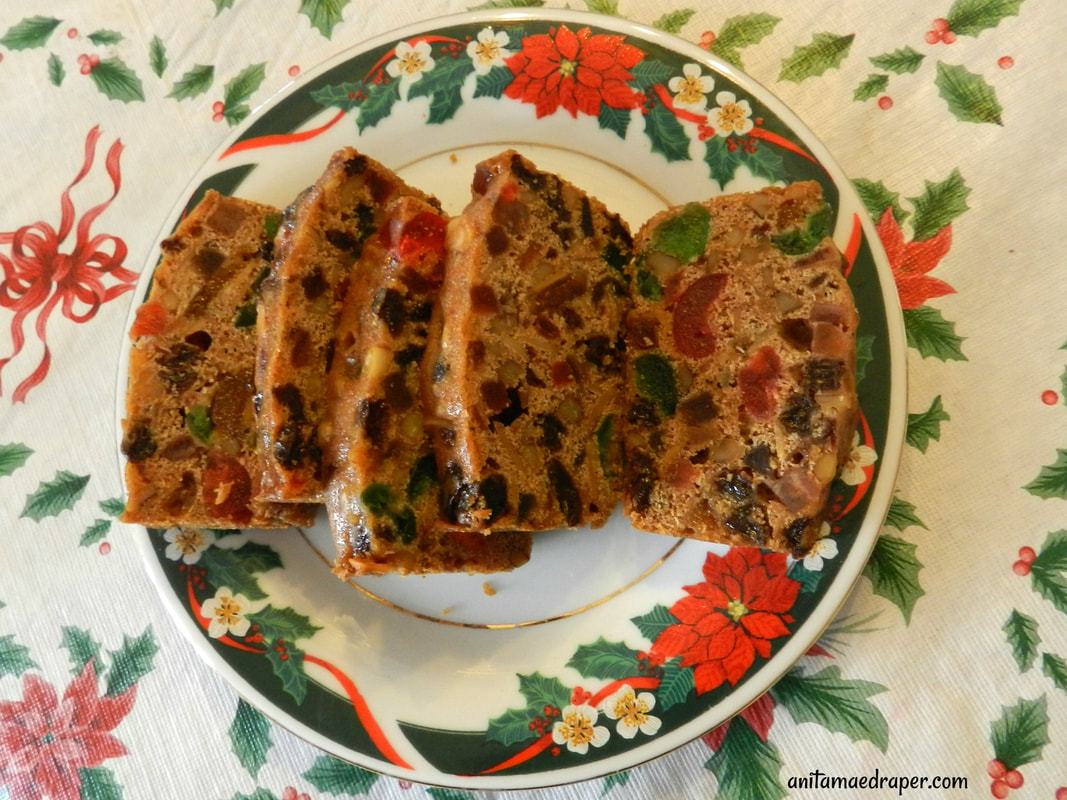
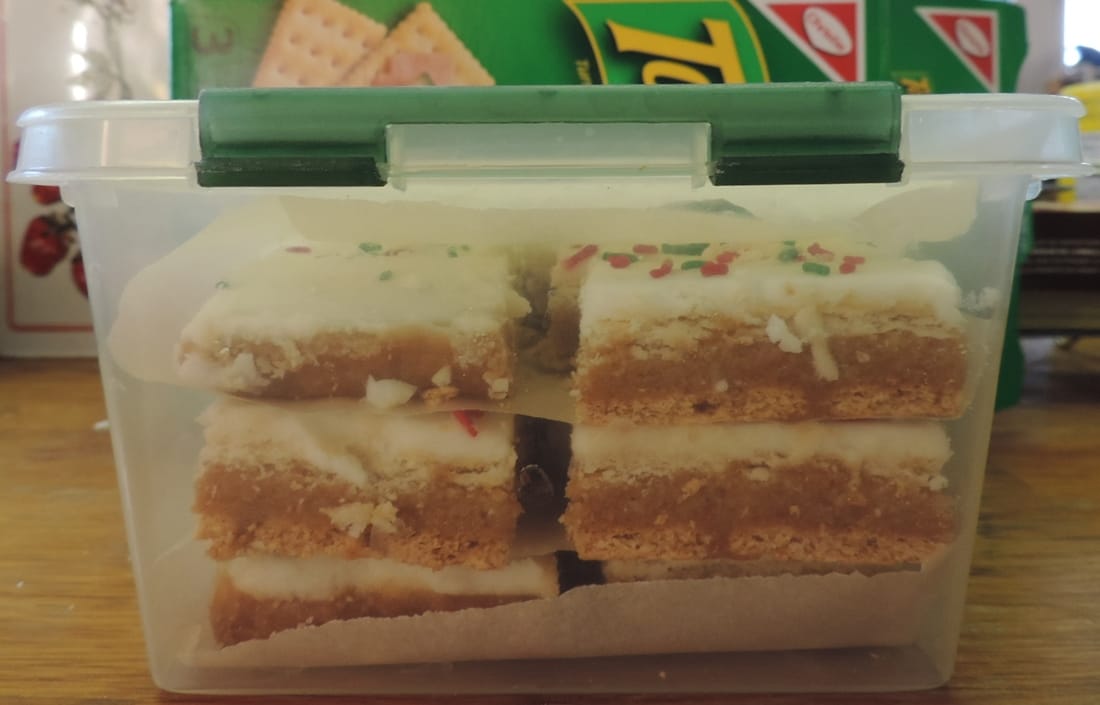
Fabulous Fruitcake made by Anita Mae Draper using the Robin Hood Flour recipe
We enjoy eating fruitcake during the holiday season and I'd like to share my favourite non-alcoholic fruitcake recipe which was published years ago in a Robin Hood Flour booklet. The recipe for Fabulous Fruitcake is now available as an interactive recipe guide on the Robin Hood Flour website. This is a neat tool where you check off eat step as you go. The recipe can also be printed off. 

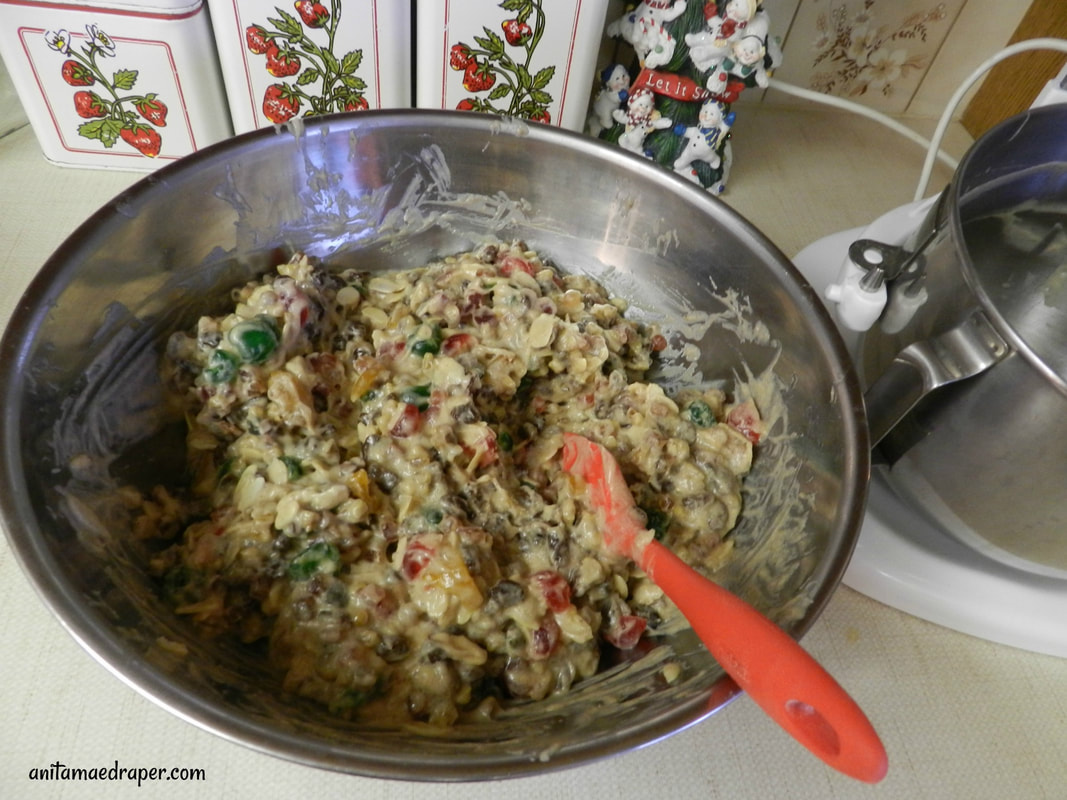
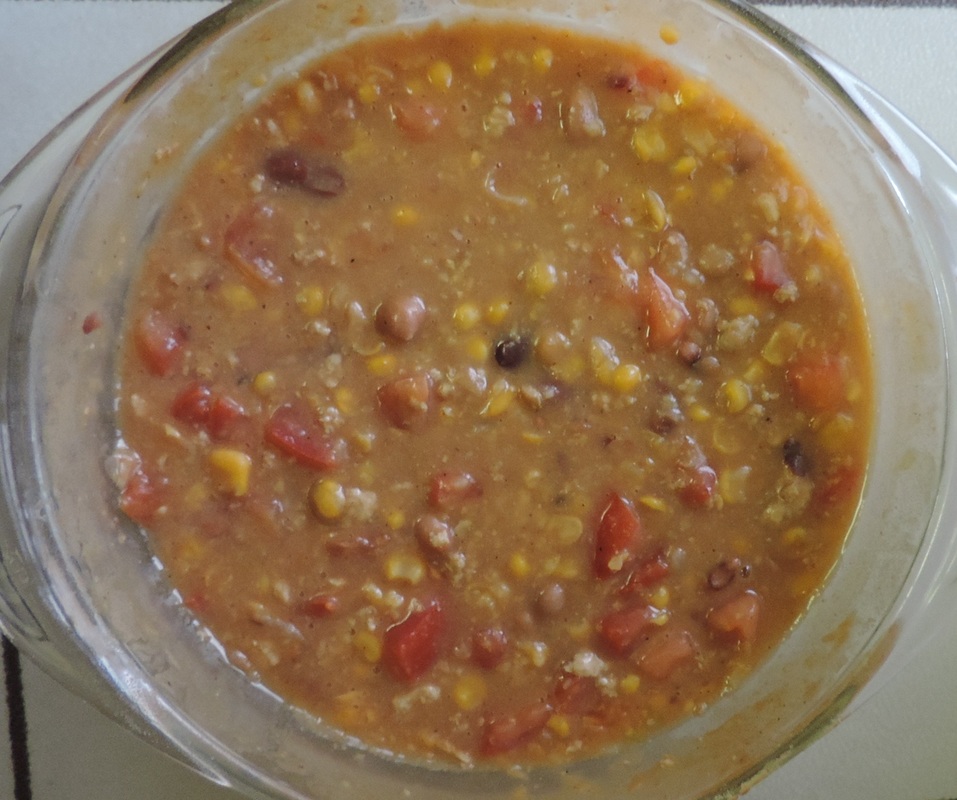
Don't worry if you don't have or don't like all of the fruit and nuts that the recipe calls for because they are interchangeable. The main thing to remember is to keep the same amounts. For example, instead of dried apricots, we'll either use dried cranberries, or increase the amount of candied cherries. We also don't use candied peel, so will use mixed glace fruits instead. For the raisins, we use some Sultana, and some golden. As long as we keep the same amounts, the fruitcake will be great.
​

Fabulous Fruitcake

Ingredients: FRUIT & NUTS

1 cup (250 mL) chopped dried apricots
3 cups (750 mL) raisins
2 cups (500 mL) candied pineapple, coarsely chopped
2 cups (500 mL) candied cherries, halved
2 cups (500 mL) mixed candied peel
2 cups (500 mL) coarsely chopped pecans
1 cup (250 mL) slivered almonds
1 cup (250 mL) ROBIN HOOD® All Purpose Flour

BATTER
1 1/2 cups (375 mL) ROBIN HOOD® All Purpose Flour
1 tsp (5 mL) baking powder
1/2 tsp (2 mL) salt
1 tsp (5 mL) cinnamon
1/2 tsp (2 mL) ground nutmeg
1/4 tsp (1 mL) ground cloves
1 1/4 cups (300 mL) butter, softened
1 1/2 cups (375 mL) liquid honey
1 tbsp (15 mL) vanilla
6 (6) eggs

Directions:
1. Preheat oven to 275°F (140°C). Prepare three 9x5" (2 L) loaf pans*, greased, lined with aluminum foil and greased again.

FRUIT & NUTS
2. Combine all ingredients. Mix well to thoroughly coat fruits with flour.
​
BATTER
3. Combine flour, baking powder, salt and spices. Mix well. Cream butter, honey and vanilla on medium speed of electric mixer. Add eggs, one at a time, beating well after each addition. Add dry ingredients on low speed, mixing just until blended. Stir in fruit and nut mixture. Mix well.

Picture
4. Spread batter evenly in prepared pans. 

*I use 4-6 small loaf pans instead of 2 large ones so that I have some to give away as gifts.


Picture
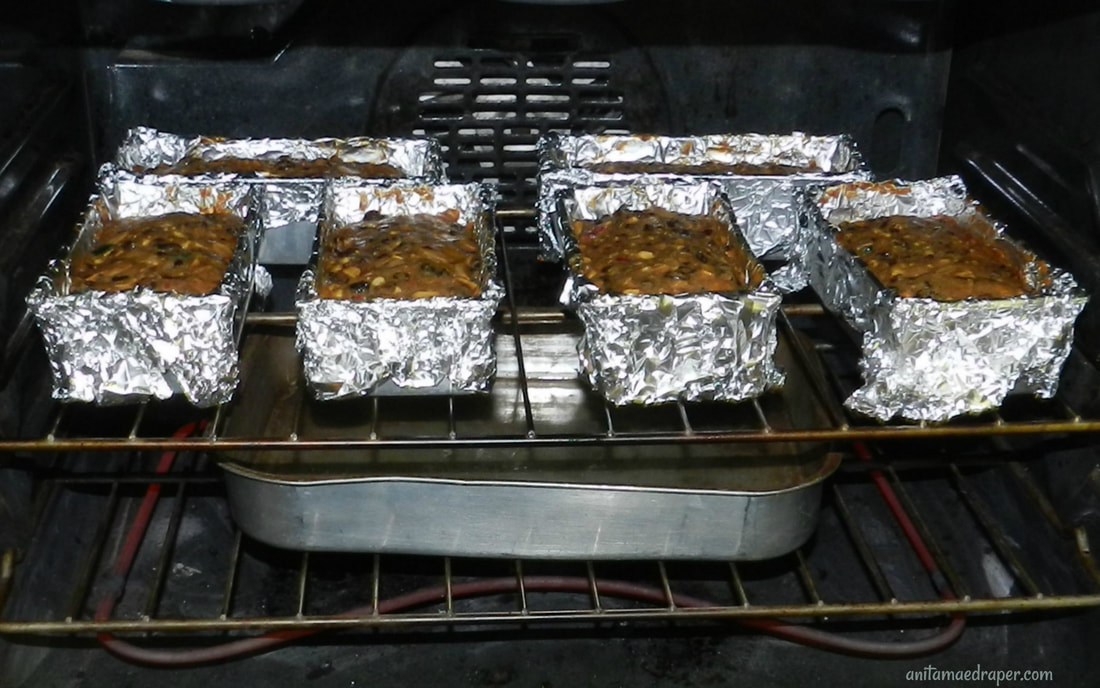
5. Place pan of hot water in oven to provide steam for moisture and bake loaves for 2 to 2 1/2 hours or until toothpick inserted in center comes out clean. Cool in pans. Remove foil. Wrap well and store in cool, dry place.
​
Picture
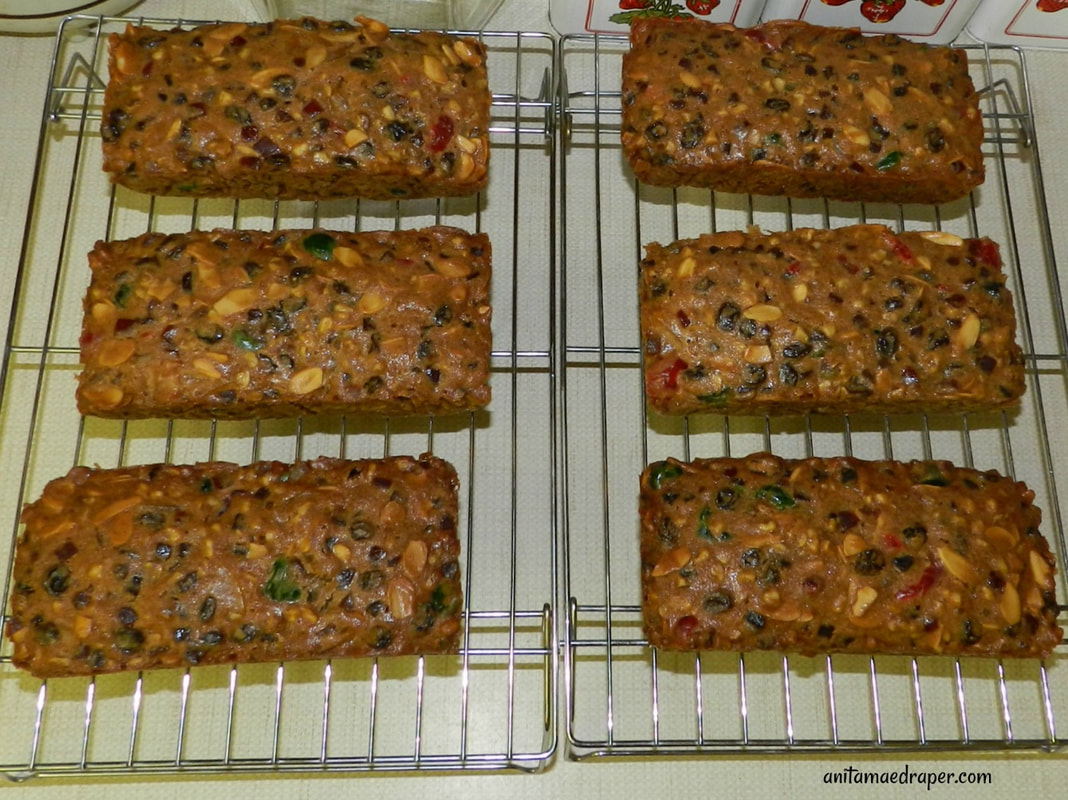
This fruitcake will keep a few months in the fridge, but not as long as one made with, and wrapped with, cheesecloth soaked in alcohol, followed by an airtight wrap.

2 Comments

Butterscotch Bars

12/17/2016

3 Comments

 
I needed a pan of squares for the church Christmas Dinner and wanted to bring something festive, sweet, and full of flavour, so I chose a Christmas favourite, Butterscotch Bars. The recipe comes my well-used copy of Company's Coming: 150 Delicious Squares by Jean Pare. 

The actual name is Oh Henry Butterscotch, but without the chocolate nutty covering, it doesn't seem like the Oh Henry bars, so we always call them plain old Butterscotch Bars.

I double most recipes, which is why you see 2 pans in most photos. 
​
Picture
Company's Coming: 150 Delicious Squares by Jean Pare
Picture
Butterscotch Bars from Company's Coming: 150 Delicious Squares

Since parchment paper came on the scene for home bakers, I line everything with it as I hate ruining my pans with sharp knives and the parchment allows me to lift the food right out and then cut.

The recipe calls for graham crackers, and I used some for the bottom of a pan to show you how they fit, which isn't well. You have to break them.

Instead, I like using Christie's Toppables. They are a soft cracker without salted tops, and fit perfectly into a 9" square pan.

​
Picture
Toppables Crackers by Christie
Picture
Top pan lined with Toppables, bottom pan lined with Graham Crackers

Combine the butter, sugar, milk and vanilla in a large saucepan. 
​
Picture

​Bring it to a boil, and then simmer for 5 mins. 

Remove from the heat. 

Add the graham cracker crumbs.
​
Picture

Mix the graham crackers crumbs until it's all well combined - remember, this is OFF the heat now.
​
Picture

Pour it carefully over the crackers in the pan(s).
​
Picture

Add another layer of crackers on top.

Picture

COOL!

I put my pans in the fridge because it is so much easier to ice when it's cooled.

A few hours later, I make my Icing:
​
Picture
Butter Icing from Company's Coming: 150 Delicious Squares by Jean Pare

I use a flat, straight-edge spoon/spatula for easy spreading. 
​
Picture

Because I wanted a festive look, I added Red and Green sprinkles while the icing was still soft.

In the following photo, the foreground shows the bars made with the Toppables, and the rest is from the pan with a graham cracker base. On the right of the image, you can see where I've turned one of each bar on an edge to show you the different undersides.

Picture
Butterscotch Bars made with Toppables base foreground and front right. Rest all have graham cracker base.
Picture

I brought one pan of Butterscotch Bars to the church, and the rest packed and ready for the freezer. 

Picture

The image below shows the Oh Henry Butterscotch from Company's Coming: 150 Delicious Squares. Theirs are slightly higher. Mine would be higher if I used an 8" square pan instead of the 9", however, the icing would be thicker, too. 


Picture
Page 17 - Company's Coming: 150 Delicious Squares by Jean Pare. Arrow shows the OH HENRY BUTTERSCOTCH

When my husband ate one of the Butterscotch Bars, I asked him what he thought. He said it tasted like caramel. I asked him if he thought it was sweet, and he said, "Oh, ya!"

Using an 8" pan then, would make it taste even sweeter, unless you didn't use all of the icing and saved it for something else. What a great idea!
3 Comments

Easiest Cooked Pumpkin and Squash

12/3/2016

0 Comments

 
Picture
Unknown squash variety grown near Wolseley, SK

A friend gave us a box of squash of an unknown variety. It sat there for about a month while the thought of chopping it apart to get to the meat and the mess of cleaning out the seeds and stuff balanced with my craving for something to use in recipes calling for pumpkin, winter squash, and sweet potatoes for baking cookies, muffins, quick breads, cakes, and pies.

A bit of research turned up the foodiewithfamily.com website which shows the easiest way ever to cook squash and pie pumpkin in a slow cooker. I was skeptical until I read the numerous comments attached to her post. And then I tried it for myself.

The post says there's no need to take the stems off before placing in the slow cooker, but the stems were prickly and took up too much room, especially in my smaller 6 quart crock pot, so I removed them while washing them clean as they still had some gritty garden dirt. 

Before I put them in though, I lined the crock pot with aluminum foil and then added the biggest squash I had. Since it was too big, I switched to 2 smaller ones instead.

Picture
Franklin Chef 6 qt crockpot with 2 unknown squash

And then I got out my big 18 qt roaster and since it has a higher lid, the biggest squash fit nicely inside - as you can see on the right side of this photo:
​
Picture
Nesco 18 quart Roaster with filled with unknown squash

With the biggest one place, I added the other squash. I wasn't sure about the smallest one sitting on top, but the roaster's high lid had plenty of extra space and I knew the steamy heat would fill the spot.

I set the crock pot on low, and the roaster on 260 F which it says is the proper temp for slow cooking. 

And then I left them alone all day long.

​After supper that evening, I used my thumb to check the skins for tenderness. The small ones were soft. In the photo below, they have a darker yellow coloring. I took those out and left the rest to continue cooking.
​
Picture

​A long kitchen knife cut through the skin without problem, and an ice cream scoop made an easy job of scooping out the seeds and stringy material from the center.

Picture

Still using the ice cream scoop, I cleaned out the rest of the skin. There wasn't much difference between cleaning out the cooked squash while it was hot or cooling, although the job was easier when the skin wasn't hot to touch with my bare hand. The skin hardened as it cooled which allowed scooping to the maximum whereas it ripped if I tried to get too close when it was warm.

Picture

This montage shows different views of one squash. Remember, the bottom was sitting on a layer of aluminum foil so it didn't stick. Parts that were overcooked show as dark brown. I didn't save them because I wanted to keep a bright yellow color, but I tasted the brown parts and they exhibited a somewhat nutty flavor. 

Picture

The top left and middle back of the next photo show the discarded seeds and stringy stuff which went to the compost pile along with the shells which hard hardened as they cooled. 

The two white bins contained the good stuff.


Picture
​
The next day, we heated some of the cooked squash, added some butter, and ate it as a side dish. I also used some of the squash instead of pumpkin and sweet potatoes to make:
  • Pumpkin Raisin Cookies 
  • Sweet Potato Pinwheels 

I froze the rest in ziploc bags:
  • 5 bags of 3 cups
  • 2 bags of 2 cups
  • 1 bag of 2 1/2 cups
​
Picture
 
As you can see in the next montage, when we took out the foil lining, the 6 qt roaster looked great after a full day of cooking. The large 18 qt roaster however contained the white scale often found in a crock pot when used in this way.
​
Picture

I'll do some research to see if I can coat the bottom with grease or something before my next batch of squash. And yes, I will be using this technique again because it was so very easy to do. 

I'd love to hear if you've tried this method and the type of squash you've cooked, regardless of whether it was a success or not. 

0 Comments

Chili Egg Breakfast Burrito

12/6/2015

0 Comments

 
Eating enough protein at breakfast keeps your energy high throughout the day. But how to do that without eating tasty--but fatty--proteins like bacon and sausage is a problem. One way is to add plant proteins like beans and other legumes, which is why you see brown beans offered at many breakfast buffets. Humus, make from chick peas, is another example of a high protein, and it makes a delicious spread on your toast. 

For me, the easiest way is to add leftovers to my breakfast. In this case, we had leftover turkey chili, so I made a breakfast burrito.
​
Picture
Chili Egg Breakfast Burrito

Chili Egg Breakfast Burrito

3            egg whites, scrambled       (or 1-2 eggs)
2 tbsp  leftover chili                          (or other beans)
1             whole wheat tortilla           (or other flour tortilla)

Mix the scrambled eggs with the chili.

Warm a tortilla in the microwave. (about 18 secs in my 1100 watt microwave)

Spread egg and chili mixture in middle of warm tortilla. Wrap and eat. 

As you can see, there are many variations depending on what you have on hand.

I usually add green onions when I'm scrambling eggs, for the color as well as the taste, but in this case, I didn't have any left, and there were plenty onions in the chili already. 

​
0 Comments

Leftover Chili Options

12/5/2015

0 Comments

 
Picture
First we made Jeremiah's Turkey Chili, then I used some to make a Chili Egg Breakfast Burrito, and then we had enough for two people. Except there were 3 of us eating supper that night.

I decided it would be a good time to show Jeremiah how a dish could be expanded with the addition of a few simple ingredients. So, to Jeremiah's original Turkey Chili recipe, we added:

3 thick slices of a salami stick we had in the fridge
2/3 cup corn kernels because we wanted a colorful vegetable

The expanded chili leftovers filled us without leaving more food to go back into the fridge. 

This turkey chili didn't really taste any different than beef chili, except that it was a bit different to brown.

I will definitely use ground turkey again if I can find it locally.

Note: we found Lilydale ground turkey multi-paks at our local Costco store
0 Comments
<<Previous

    Kitchen Journal

    I've kept a kitchen journal for years to help me locate favourite recipes in my 100 cook book collection.

    The journal was especially handy during the years I entered baking products in local and provincial fairs.

    As I taught my children how to bake first and then cook, they filled in their own journals. I still have my girls' journals although they may have started 'grown up' ones when they left home.  These handwritten journals are a treasure trove of recipes, personal observations, and culinary rewards. 

    However, our handwritten  journals fail in the ability to share recipes and kitchen knowledge. That's where this new online journal takes over.

    Please join us (the Draper's Acres crew) by sharing your own observations in a comment or by emailing us through our contact page .


    Check below for links to my favorite recipe sites.

    Archives

    November 2018
    December 2016
    December 2015
    November 2015
    July 2015
    September 2014
    December 2012
    February 2012
    December 2011
    November 2011
    October 2011
    September 2011
    August 2011

    RSS Feed


    Links to fun kitchen
    & recipe sites:
    The Yankee Belle Cafe
    Inspirational Romance authors share recipes

    Foodie with Family
    Practical Recipes including Weekly Meal Plans

    ​

    Categories

    All
    Almond
    Bars
    Beans
    Biscuit Mix
    Blueberries
    Breakfast
    Broccoli
    Bundt
    Burrito
    Butterscotch
    Cake
    Carrot
    Cheesecake
    Chili
    Chocolate
    Christmas
    Company's Coming
    Cookies
    Crackers
    Crock Pot
    Cucumber
    Decorated
    Dessert
    Dessert Auction
    Dried Fruit
    Eggs
    Freezing
    Fruit
    Fruitcake
    Garnish
    Glaze
    Green Tomatoes
    Icing
    Mincemeat
    Nuts
    Orange
    Pastry
    P F R A
    Pie
    Pot Blessing
    Preserving
    Pumpkin
    Quiche
    Relish
    Slow Cooker
    Soup
    Spinach
    Squares
    Squash
    Stuffing Mix
    Thanksgiving
    Tomatoes
    Tortilla Wrap
    Turkey
    White Chocolate
    Yogurt
    Zucchini

    RSS Feed

Created on Weebly  - Copyright Anita Mae Draper 2011-2024
​