Anita Mae Draper
  • Home
  • Books
    • Secret Admirer
    • American Heiress Brides
    • Austen in Austin
    • Here We Come A-Wassailing
    • Riding on a Christmas Wish
  • Blogs
    • Writing/Author Blog
    • Author Memories to Ancestry Quest
    • Inkwell Inspirations
    • Heroes, Heroines, & History
    • Draper's Acres
    • Photo Blog
  • Research
    • The Oregon Trail Ruts
  • Contests & Giveaways
  • Fun
    • Text-Free Photos
    • Recipe Blog
    • Jigsaw Puzzles >
      • Christmas
      • Fauna
      • Flora
      • Travel Destinations
    • Free Reads >
      • The Shepherd
    • Poetry >
      • You Were By My Side
  • About Me
    • Long Bio
    • Media Kit
  • Contact

Jeremiah's Chili

11/23/2015

0 Comments

 
Since I'm readying 17 yr old Jeremiah for life away from home, I'm getting him to do more of the cooking that doesn't include convenience meals. So last week when I decided to make chili, I figured it would be a good time for Jeremiah to try - especially since he loves my chili. Except this time I'd let him put his culinary touch on it.

There are no photos for this one as I didn't want him to feel crowded with me hovering over his shoulder while he made the chili. I'll post a photo of what we did with the leftovers though in a later post. 
We started out with a recipe that called for 2 lbs of ground turkey and all sorts of stuff, some of which we don't have, or that Jeremiah didn't want to add. And we only had 1 pound of ground turkey, so, here's what he used:

Turkey Chili

Ingredients:

1 lb   ground turkey breast
1 med   onion, chopped
2 (15 oz) cans    mixed beans, undrained
1 (12 oz) can   maple flavored beans
3    fresh tomatoes, diced
1 clove   garlic, minced
1 rounded tsp    taco seasoning
1 rounded tsp    paprika
1/2 tsp   ground pepper
1 tsp   course sea salt

Options:
- canned diced tomatoes vice fresh
- red/green sweet peppers
- chopped zuchini


Method:

1. Brown ground turkey in large dutch oven along with onions. As we used extra lean turkey, there was no excess fat to drain off, but if you have it, it should be drained off at this point.

2. Add the rest of the  ingredients to the cooked turkey. 

3. Jeremiah didn't add veggies like red/green sweet peppers or zuchini, but if you're adding them, saute until all veggies are tender. If you're using canned tomatoes, add them at this point. 

4. Bring to a boil, then simmer for 15-20 mins.

5. The original recipe called for adding the spices at this point, but Jeremiah added his in the saute stage. We didn't notice a difference.

6. Mix well, then simmer for 5 more minutes. Orig recipe calls for adding more salt and pepper to taste. Jeremiah tasted it and said, "Wow!" He didn't add anything else.

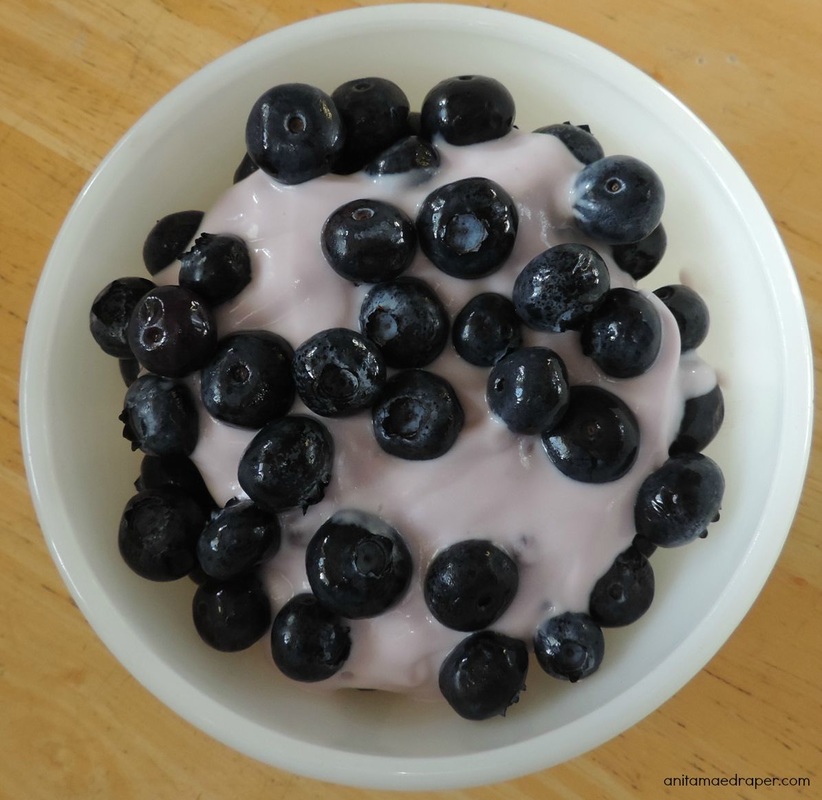
It was very good. We put the leftovers in a medium casserole dish and used the next day. I'll post those recipes soon. 
       
0 Comments

Blueberries and Yogurt

7/20/2015

0 Comments


A simple breakfast of blueberries and yogurt.

Picture
Danone Activa Probiotic Blueberry Yogurt with the addition of fresh blueberries.
Hubby brought some blueberries home and so I mixed them with the yogurt I had on hand today which happened to be Danone Activa Probiotic Blueberry. 

By itself, the Activa blueberry yogurt is quite good, but the addition of fresh blueberries brought this breakfast up a notch. 
0 Comments

Cucumber Relish

9/19/2014

0 Comments

 
For the story about how I acquired this recipe from Marie Drouin, and bonus information about kids entering a country fair, check out Got Cukes? Make Relish on my group blog, Inkwell Inspirations. 

This is a no-cook recipe where most of the work involves chopping the cukes, onions, celery, and peppers. If you want more color, use more red peppers than green. I've known cooks who've added green food coloring to make it look more like the store-bought relish, but I've never felt the need for it.

Use the thick, 8-9 inch cucumbers like the one in the following photo instead of the long slender English cukes or the small pickling ones. (Update - more images below)

Picture
2004 Weyburn Fair entry, 2nd place, JJ Draper, 6 yrs old

Cucumber Relish

12          green cucumbers, unpeeled
12          medium onions
1            celery stalk
4            green and red peppers
4 cups   vinegar
6 cups   white sugar
2 tsp      celery seed
2 tsp      mustard powder
2 tsp      turmeric
1/4 cup salt

Don't peel cucumbers, but it's up to you if you want to take out or leave in the seeds. Personally, I cut them out the same way I cut out zucchini seeds before throwing them in a food chopper. 

Chop the cucumbers, onions, celery stalk, and peppers into small pieces like you see in the store-bought relish.

Mix all the ingredients together making sure the sugar dissolves. The relish consistency depends on how fine you've chopped the produce. I've strained the mixture right after mixing which has thickened the relish, but wasn't as flavorful as when I've stored it with all liquid-drenched spices. If you don't strain when processing and find there's too much liquid, you can always drain some off when you open it for use. 

Ladle into sterilized pint preserving jars and seal. 

Yield: 9-13 pints depending if you strain first, and the size of your veggies.


UPDATE! After a bit of searching, I found these photos on the net:

Picture
Top: 3-4 inch Pickling cucumber; Bottom: 8-9 inch Slicing cucumber; Courtesy of Wikimedia Commons
Picture
Showing slices off a Slicing cucumber. Courtesy of Wikimedia Commons
Picture
Dark green, thick-skinned, glossy Slicing cucumber growing on its vine. Courtesy of Wikimedia Commons
0 Comments

Almond Macaroons

12/30/2012

0 Comments

 
1 can
6 cups
1 cup
 
condensed milk
shredded sweet coconut
slivered almonds
 glazed red and green cherries, halved
Pour the can of condensed milk over the coconut and almonds. Mix well by hand. Form into 2" balls and place on greased cookie sheet.   Press a cherry half into the top of each macaroon. Bake at 350 degrees F for 10-12 minutes, or until tinged with a golden color. 
Note: I use those thin latex/surgical gloves for mixing. 
0 Comments

Triple Chocolate Cheesecake

2/29/2012

1 Comment


Triple Chocolate Cheesecake

I made this cheesecake for our annual church Dessert Auction Fundraiser with all proceeds going to the youth group. It's very easy, but should be started the day before or early morning to allow for chilling time.

Although you can buy a crumb crust, this recipe from the Hershey's Chocolate Lover's Cookbook calls for a crust made with vanilla crumbs and cocoa. I take the Chocolate Festival Cheesecake, use chocolate crumbs, and call it a Triple Chocolate Cheesecake.
Picture
Triple Chocolate Cheesecake with White Chocolate Butterflies (Quadruple chocolate?) Another (better) photo of the top is at the end of this post.

Chocolate Crumb Crust
1 ¼ cups (about 40 wafers)
1/3 cup         
1/3 cup
 ¼ cup (1/2 stick)
vanilla wafer crumbs*
powdered sugar, sifted
cocoa, sifted
butter or margarine, melted
Heat oven to 350°F.
 
In a small bowl, stir together vanilla* wafer crumbs, powdered sugar and cocoa. I used chocolate crumbs and 2 tbsps of cocoa.
Picture
Chocolate crumbs, powdered sugar, and cocoa. (But I forgot to sift.)
Picture
Mixed together
Stir in melted butter/margarine.
Picture
Melted butter/margarine added.
Picture
Melted butter/margarine brings it al together.
Although the cookbook doesn't call for this, I make a bottom out of parchment paper to slide the cheesecake off the pan. Very easy, and no one cutting the bottom of my springform pan.
Picture
Draw on the outside of the pan, but cut an 1/8" inside to fit.
Picture
My cutting skills aren't perfect, but it's good enough.
Press the crumb mixture onto bottom and ½ inch up the side of a 9-inch springform pan. I use a metal one-cup measuring cup. It's rounded nicely at the bottom edge and provides a nice tapered side. It also slides nicely with gentle finger pressure to make an even bottom.
Picture
A one-cup measuring cup slides easily and leaves smooth surface.
Bake 8-10 minutes. Cool.

Triple Chocolate Cheesecake

3 packages (8 oz each)
1  1/4 cups
1/4 cup
1/2 cup
2 teaspoons
2 tablespoons
3
cream cheese, softened (I used 2 regular & 1 Light)
sugar
cocoa
sour cream
vanilla extract
all-purpose flour
eggs
Heat oven to 450°F. In a large mixer bowl, combine cream cheese, sugar, cocoa, sour cream and vanilla.
Picture
Cream cheese, sugar, cocoa, sour cream and vanilla.
Beat on medium speed of electric mixer until smooth. Add flour and eggs. Beat well.
Picture
Beaten and ready for pouring.
Pour into prepared Chocolate Crumb Crust.
Picture
Oven ready.
Bake 10 minutes. Without opening oven, reduce temperature to 250°F.

Continue baking 30 minutes. (Don't open door, but if your oven has a light and you can see it, the cheesecake may not appear set in middle.)

Turn off oven. Leave cheesecake in oven 30 minutes without opening door. Remove from oven.

With knife, loosen cake from side of pan. Cool to room temperature. Remove side of pan.
Picture
Out of oven, but still have to run dull knife around edge to loosen from side.
Refrigerate several hours or overnight. I did for one hour as I was pressed for time and knew it wouldn't be eaten until the next day.

Garnish* with chocolate curls or sliced fruit and whipped cream, if desired.
Picture
*For garnish, I use chocloate dipping wafers (or Wilton candy melts).  Although I have a double boiler, I use a Corning bowl (the one with a wide handle/spout on one side and smaller on the other) or metal bowl over a pot of softly simmering water. Pour approx 1/2 cup chocolates wafers into the bowl and stir as it melts, ensuring you don't let any water or condensation mix in with your chocolate or it won't work/harden as well.

Once they are all melted, pour the milk chocolate into a 6" Wilton bottle made for this purpose, and squirt the chocolate in whatever design you wish. Sometimes I make flower or lattice designs. 

This year, I had one bowl of milk chocolate wafers melting beside a bowl of white chocolate wafers. I was trying to start with a milk chocolate free-hand and then have it end and the white begin in one continuous stream, like varigated yarn. It didn't work.

As you can see in the photo below - around the edge in the foreground - the brown color didn't end when the white started, but rather mixed together. I tried to work this lighter color around the edge to give the design a more even look (as if it was planned).

I then added more white chocolate to the bottle, squirted into the chocolate bowl until only white came out, then made my white chocolate butterflies on a sheet of parchment. As the butterflies harden, the parchment should be tucked into the middle groove of a cardboard egg carton*, but the dessert auction was quickly approaching and I ran to get dressed. By the time I got back to the kitchen, only the thickest butterfly was bendable. Usually I'd use only the best ones, but this time, they were all iffy. Still, I took the best and left the rest.
* Let me know if you want photos of this design idea.
Picture
Triple Chocolate Cheesecake with White Chocolate Butterflies (Quadruple chocolate?)
Cover. Refrigerate leftover cheesecake.

Yield 10 to 12 servings.


Because I was taking this to sell, I slid the cheesecake off the pan bottom and onto this glass cake stand (the parchment sticks to the bottom of the cake). In other years, I found that if I sell the stand with the cheesecake, I can put a minimum starting bid and sell it for more. This Anchor glass cake/trifle stand/punch bowl combo usually sells at Walmart for $10, but this year, they had them on sale for $5. That's a small price when my cheesecakes usually go for $40 to $100 at the dessert auction. (Last year I brought 3 different cheesecakes and since there were more to go around, one sold for only $40. This year, I'm only bringing this one.)

The chocolate dries fast. Within 15 minutes of adding the white chocolate butterflies, I was able to cover the cheesecake with a layer of Saran plastic wrap ending on the glass edge. This served 2 purposes... it stopped the glass lid from rattling as well as sliding into the cheesecake as we have a 30 min drive on gravel roads to the church.

They saved my Triple Chocolate Cheesecake for the end, asking if the cake stand when with it. I said, yes, with a minimum bid of $50. It sold for $75.

Photos taken at the Dessert Auction Fundraiser can be found at the News From the Pews blog.

1 Comment
<<Previous
Forward>>

    Kitchen Journal

    I've kept a kitchen journal for years to help me locate favourite recipes in my 100 cook book collection.

    The journal was especially handy during the years I entered baking products in local and provincial fairs.

    As I taught my children how to bake first and then cook, they filled in their own journals. I still have my girls' journals although they may have started 'grown up' ones when they left home.  These handwritten journals are a treasure trove of recipes, personal observations, and culinary rewards. 

    However, our handwritten  journals fail in the ability to share recipes and kitchen knowledge. That's where this new online journal takes over.

    Please join us (the Draper's Acres crew) by sharing your own observations in a comment or by emailing us through our contact page .


    Check below for links to my favorite recipe sites.

    Archives

    November 2018
    December 2016
    December 2015
    November 2015
    July 2015
    September 2014
    December 2012
    February 2012
    December 2011
    November 2011
    October 2011
    September 2011
    August 2011

    RSS Feed


    Links to fun kitchen
    & recipe sites:
    The Yankee Belle Cafe
    Inspirational Romance authors share recipes

    Foodie with Family
    Practical Recipes including Weekly Meal Plans

    ​

    Categories

    All
    Almond
    Bars
    Beans
    Biscuit Mix
    Blueberries
    Breakfast
    Broccoli
    Bundt
    Burrito
    Butterscotch
    Cake
    Carrot
    Cheesecake
    Chili
    Chocolate
    Christmas
    Company's Coming
    Cookies
    Crackers
    Crock Pot
    Cucumber
    Decorated
    Dessert
    Dessert Auction
    Dried Fruit
    Eggs
    Freezing
    Fruit
    Fruitcake
    Garnish
    Glaze
    Green Tomatoes
    Icing
    Mincemeat
    Nuts
    Orange
    Pastry
    P F R A
    Pie
    Pot Blessing
    Preserving
    Pumpkin
    Quiche
    Relish
    Slow Cooker
    Soup
    Spinach
    Squares
    Squash
    Stuffing Mix
    Thanksgiving
    Tomatoes
    Tortilla Wrap
    Turkey
    White Chocolate
    Yogurt
    Zucchini

    RSS Feed

Created on Weebly  - Copyright Anita Mae Draper 2011-2018